0x00
关于CentOS+Base+Barnyard2+Suricata就不多说了,这里有文章已经写的很详细了。
请参考:http://drops.wooyun.org/tips/413
0x01
这里安装CentOS6系统同样是使用最小化安装,[email protected] @Development Tools @Development Library
系统安装完毕后,初始化安装软件包
[[email protected] ~]#yum -y install libyaml libyaml-devel gcc gcc-c++ make file file-devel git libxslt-devel curl curl-devel ImageMagic ImageMagic-devel
[[email protected] ~]#yum -y install mysql mysql-libs mysql-server mysql-devel
[[email protected] ~]#/usr/bin/mysql_secure_installation
[[email protected] ~]#yum -y install httpd httpd-devel apr-utils php php-common php-cli php-pear php-curl php-mcrypt php-pecl php-devel php-mysql
[[email protected] ~]#ln -sf /usr/lib64/mysql /usr/lib/mysql
[[email protected] ~]#sed -i 's/Options Indexes FollowSymLinks/Options FollowSymLinks/g' /etc/httpd/conf/httpd.conf
[[email protected] ~]#sed -i 's/ServerTokens OS/ServerTokens Prod/g' /etc/httpd/conf/httpd.conf
[[email protected] ~]#sed -i 's/ServerAdmin [email protected]/ServerAdmin [email protected]/g' /etc/httpd/conf/httpd.conf
[[email protected] ~]#/etc/init.d/httpd restart
0x02
安装Ruby:
[[email protected] opt]#wget http://ftp.ruby-lang.org/pub/ruby/1.9/ruby-1.9.3-p327.tar.gz
[[email protected] opt]#tar zxvf ruby-1.9.3-p227/
[[email protected] ruby-1.9.3-p227]#./configure
[[email protected] ruby-1.9.3-p227]#make && make install
[[email protected] ruby-1.9.3-p227]#cd ../
安装openssl extensions
[[email protected] ~]#cd /opt/
[[email protected] opt]#cd ruby-1.9.3-p227/ext/openssl
[[email protected] openssl]#ruby extconf.rb
[[email protected] openssl]#make && make install
[[email protected] openssl]#cd ../../../
0x03
安装rubygems
[[email protected] ~]#cd /opt
[[email protected] opt]#tar zxvf rubygems-1.8.24.tar.gz
[[email protected] opt]#cd rubygems-1.8.24/
[[email protected] opt]#ruby setup.rb
更改gem源
[[email protected] ~]#gem sources -l
[[email protected] ~]#gem sources -r https://rubygems.org/
[[email protected] ~]#gem sources –a http://ruby.taobao.org/
[[email protected] ~]#gem sources -u
安装gems包
[[email protected] ~]#gem install bundle
[[email protected] ~]#gem install thor i18n bundler tzinfo builder memcache-client rack rack-test erubis mail rack-mount rails --no-rdoc --no-ri
[[email protected] ~]#gem install tzinfo-data
[[email protected] ~]#gem install rake --version=0.9.2 --no-rdoc --no-ri
[[email protected] ~]#gem uninstall rake --version=0.9.2.2
0x04
安装wkhtmltopdf
[[email protected] ~]#cd /opt
[[email protected] ~]#wget http://wkhtmltopdf.googlecode.com/files/wkhtmltopdf-0.9.9-static-amd64.tar.bz2
[[email protected] ~]#tar jxvf wkhtmltopdf-0.9.9-static-amd64.tar.bz2
[[email protected] ~]#cp wkhtmltopdf-amd64 /usr/local/bin/wkhtmltopdf
[[email protected] ~]#chown root.root /usr/local/bin/wkhtmltopdf
0x05
安装配置snorby:
[[email protected] ~]#cd /var/www/html
[[email protected] html]#git clone http://github.com/Snorby/snorby.git
[[email protected] html]#cd /var/www/html/snorby/config/
[[email protected] config]#cp database.yml.example database.yml
[[email protected] config]#cp snorby_config.yml.example snorby_config.yml
[[email protected] config]#chown -R apache.apache /var/www/html/snorby/
修改database.yml,在“Enter Password Here”这里填入MySQL数据库的密码
修改snorby_config.yml,把time_zone前面的注释去掉,并把UTC改为Asia/Chongqing
[[email protected] config]#cd ../
[[email protected] snorby]#bundle exec rake snorby:setup
[[email protected] snorby]#bundle exec rails server -e production &
此处开启http://0.0.0.0:3000端口的监听(此步骤需翻墙)
[[email protected] snorby]#ruby script/delayed_job start RAILS_ENV=production
此处开启snorby的进程
0x06
关于Apache+mod_passenger
关于mod_passenger的配置:
为了方便访问,每次都手动输入3000端口显得非常麻烦,把ruby跟apache结合起来需要mod_passenger,安装过程如下:
1、 使用gem安装passenger
[[email protected] ~]#gem install --no-ri --no-rdoc passenger
2、 安装apache模块
[[email protected] ~]#/usr/local/bin/passenger-install-apache2-module –a
3、 配置apache
[[email protected] ~]#cd /etc/httpd/conf.d/
4、 新建一个snorby.conf
LoadModule
passenger_module /usr/local/lib/ruby/gems/1.9.1/gems/passenger-4.0.14/buildout/apache2/mod_passenger.so
PassengerRoot /usr/local/lib/ruby/gems/1.9.1/gems/passenger-4.0.14
PassengerDefaultRuby /usr/local/bin/ruby

<VirtualHost *:80>
ServerName snorby.domain.com # !!! Be sure to point DocumentRoot to 'public'!
DocumentRoot /var/www/html/snorby/public
<Directory /var/www/html/snorby/public> # This relaxes Apache security settings.
AllowOverride all # MultiViews must be turned off. Options -MultiViews
</Directory>
</VirtualHost>
5、 重启apache
6、 界面
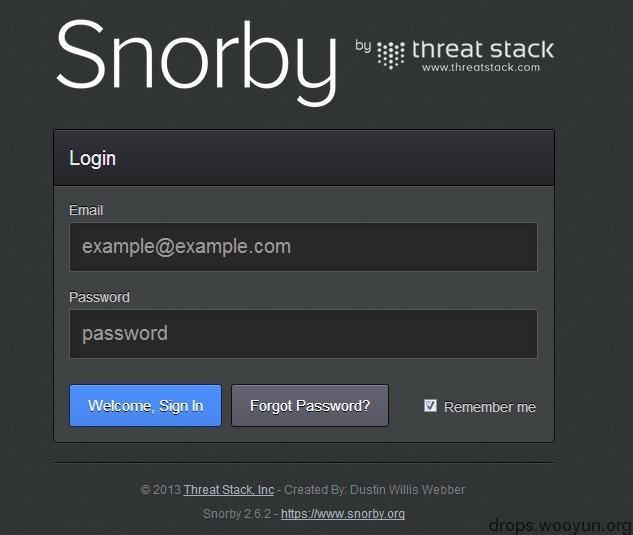
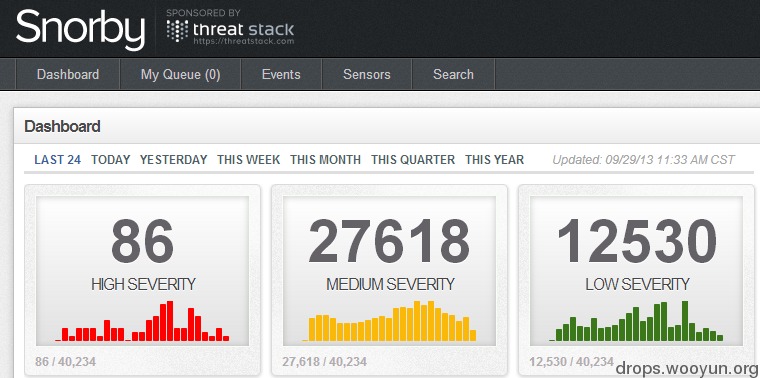



![Connectify Dispatch指定程序使用指定网卡[运维神器]](http://www.vuln.cn/wp-content/uploads/2016/11/1.jpg)
![网站备案流程_网站备案需要什么[简单明了解决备案各种问题]](http://www.vuln.cn/wp-content/uploads/2014/03/topleft.gif)
![最新BurpSuite 1.7.32 破解版[注册机]下载【无后门版】](http://www.vuln.cn/wp-content/uploads/2018/02/ee462f76d3e2440f67041f92499c36ae.png)
![php一句话后门的几种变形分析[preg_replace函数]](http://www.vuln.cn/wp-content/uploads/2016/11/11.jpg)



![[网盘下载] GB/T 23031. 1 — 2022 工业互联网平台 应用实施指南 第一部分:总则.pdf](http://www.vuln.cn/wp-content/uploads/2023/02/3faee12ec28ab59793fbe1c203b8363f.png)
![[网盘下载] GB/T 41870-2022 工业互联网平台 企业应用水平与绩效评价.pdf](http://www.vuln.cn/wp-content/uploads/2023/02/4ec246e126c4f3a41d9ced588c790998.png)
![[网盘下载] GB/T 36323-2018 信息安全技术 工业控制系统安全管理基本要求.pdf](http://www.vuln.cn/wp-content/uploads/2023/02/f6adb0f6fa49a734846c5873d178bfbc.png)
![[网盘下载] GB/T 32919 -2016 信息安全技术 工业控制系统安全控制应用指南.pdf](http://www.vuln.cn/wp-content/uploads/2023/02/da9420e72b7af6bfb4fa273884dcefc1.png)
 云悉指纹
云悉指纹